Recomendado. CC2 @WINOPTIMIZER https://ml.wpoptimizers.xyz/te/cl/eyJ2Ijoie1wiYVwiOjE0MDQ0MixcImxcIjo3MTQ4MjQzMjQ4Mzc1NjAyNCxcInJcIjo3MTgxMTc3NDQ5ODczNTg3NX0iLCJzIjoiZjZlOTFjM2Q4ZWI1N2VkMyJ9 https://docs.google.com/spreadsheets/d/13wa5QJGu-vT8IEN_QnWI6lGNgDz1QOWvoJWjPhjdwDY/edit?usp=sharing ¡Gracias por descargar nuestra checklist WPO para WordPress! Esperamos que te ayude a comprobar la optimización de tu web WordPress y a optimizarla. Recuerda que la optimización de WordPress es una tarea constante y hay que estar al día de todo. Si quieres recibir consejos de optimización probados, análisis de rendimiento de temas y plugins, noticias, novedades y las actualizaciones de esta checklist, únete gratis a nuestra newsletter semanal. | |
Cómo usar esta checklist WPO: – Copia: Haz una copia por cada web a optimizar, pulsando en archivo – hacer una copia o descargar. – Web: Añade el nombre de la web a optimizar, al nombre del archivo. Ej. Checklist WPO miweb.com. – Columna Tareas: Información de la tarea (enlace las guías en el símbolo ?). – Columna Realizada: Marca con una X cuando la tarea esté completa o un comentario con el motivo por el cuál no se pudo realizar. | |
| Test de velocidad Estas serían unas buenas métricas que puedes averiguar, haciendo un test de velocidad a WordPress. | Realizada |
| Tiempo de carga inferior de 2 segundos en móvil ? | |
| TTFB inferior a 200 ms ? | |
| Peso inferior a 1 MB ? | |
| Peticiones inferiores a 50 ? | |
| FCP o First Contentful Paint inferior a 1.8 segundos en móvil ? | |
| LCP o Larguest ContentFull Paint inferior a 2.5 segundos en móvil ? | |
| CLS o Cumulative Layout Shift inferior a 0.1 segundos en móvil ? | |
| Mejor hosting El hosting debe de cumplir con los siguientes requisitos, que puedes ver en los hostings que recomendamos. | Realizada |
| Localización cercana al público objetivo ? | |
| Mejor registrador de dominios ? | |
| Mejor DNS ? | |
| Discos duros SSD ? | |
| HTTP2 ? | |
| Hosting optimizado Optimiza el hosting haciendo las siguientes tareas. | Realizada |
| Caché hosting desactivada (depende) ? | |
| Compresión GZIP ? | |
| Caché navegador ? | |
| Versión PHP >= 7.4 ? | |
| Memoria PHP >= 256MB ? | |
| Tiempo de ejecución de PHP > 300 ms ? | |
| SSL para HTTP2 ? | |
| Keep Alive ? | |
| Optimizar recursos Lo primero que hay que optimizar, son los recursos de WordPress. | Realizada |
| Actualizar WordPress ? | |
| Analizar tema y plugins pesados ? | |
| Detectar temas y plugins lentos ? | |
| Solucionar errores 404 ? | |
| Optimizar AJAX ? | |
| Optimizar DOM ? | |
| Optimizar HTML ? | |
| Query string ? | |
| Optimizar heartbeat ? | |
| Optimizar cron ? | |
| Seguridad WordPress (opcional) ? | |
| Externalizar cuentas de correo (opcional) ? | |
| Limpiar imágenes sin usar (opcional) ? | |
| Evitar hotlinking (opcional) ? | |
| Optimizar base de datos Realiza las siguientes tareas para optimizar la base de datos. | Realizada |
| Limpiar base de datos ? | |
| Solucionar queries lentas ? | |
| Configurar Memcached (o Redis) ? | |
| Configurar Redis (o Memcached) ? | |
| Activar caché Antes elige el mejor plugin de caché para ti. | Realizada |
| Activar caché ? | |
| Activar precarga ? | |
| Borrar caché (para aprender) ? | |
| Cachear WooCommerce (si lo tienes) ? | |
| Cachear membership site (si lo tienes) ? | |
| Optimizar imágenes Antes elige el mejor plugins para optimizar imágenes para ti. | Realizada |
| Reducir peso ? | |
| Optimizar miniaturas ? | |
| Optimizar Favicon ? | |
| Optimizar banner de imagen ? | |
| Optimizar WebP ? | |
| Optimizar GIFs ? | |
| Optimizar gravatar ? | |
| Activar Lazy Load ? | |
| Precarga imágenes ? | |
| Optimizar vídeos Optimiza los vídeos de WordPress | Realizada |
| Vídeos YouTube (si usas YouTube) ? | |
| Vídeos Vimeo (si usas Vimeo) ? | |
| Reducir peso de los vídeos ? | |
| Servir vídeos con CDN (si usas CDN) ? | |
| Optimizar fuentes Optimiza las fuentes de WordPress. | Realizada |
| No más de 5 fuentes ? | |
| Optimizar Google Fonts ? | |
| Alojar fuentes (alternativa a optimizar Google Fonts) ? | |
| Optimizar Font Awesome (si usas Font Awesome) ? | |
| Optimizar texto visible ? | |
| Precargar fuentes ? | |
| Usar iconos SVG ? | |
| Optimizar CSS Optimiza el CSS de WordPress. | Realizada |
| Optimizar dashicons ? | |
| Optimizar CSS en línea ? | |
| Desactivar CSS sin usar ? | |
| Minificar CSS ? | |
| Combinar CSS (opcional) ? | |
| Crear CSS crítico ? | |
| Optimizar JavaScript Optimiza el JavaScript de WordPress. | Realizada |
| Optimizar Emoji ? | |
| Optimizar JQuery ? | |
| Optimizar JavaScript en línea ? | |
| Desactivar JavaScript sin usar ? | |
| Minificar JavaScript ? | |
| Combinar JavaScript (opcional) ? | |
| Carga diferida de JavaScript ? | |
| Optimizar scripts externos Optimiza los scripts externos que use tu web. | Realizada |
| Optimizar Google Analytics ? | |
| Optimizar Píxel de Facebook ? | |
| Optimizar Google Maps ? | |
| Optimizar reCAPTCHA ? | |
| Optimizar chats ? | |
| Optimizar Adsense ? | |
| Aplazar JavaScript ? | |
| Precargar peticiones DNS (depende) ? | |
| Optimizar WooCommerce WooCommerce no es lento, pero debe ser optimizado. | Realizada |
| Optimizar wc-ajax=get_refreshed_fragments ? | |
| Optimizar comprobador de contraseñas ? | |
| Optimizar Stripe ? | |
| Optimizar plugins Si usas alguno de estos plugins, mira tareas específicas para optimizarlos. | Realizada |
| Optimizar Divi ? | |
| Optimizar Elementor ? | |
| Optimizar Contact Form 7 ? | |
| Optimizar Jetpack ? | |
| Optimizar plugins sociales ? | |
| Optimizar formularios de suscripción ? | |
| Uso de WP Rocket junto a Perfmatters ? | |
| Configurar CDN Es muy recomendable usar un CDN en WordPress. | Realizada |
| Análisis BunnyCDN ? | |
| Cloudflare VS BunnyCDN ? | |
| Configurar BunnyCDN ? | |
| Configurar CloudFlare ? | |
| Configurar BunnyCDN con Cloudflare ? | |
| Optimizar Core Web Vitals Estas tareas se realizan después de optimizar WordPress, para afinar estas métricas. | Realizada |
| Reducir tiempo de respuesta del servidor ? | |
| Reducir tiempo de ejecución de JavaScript ? | |
| Minimizar el trabajo del hilo principal ? | |
| Optimizar FCP ? | |
| Optimizar LCP ? | |
| Optimizar CLS ? | |
| Evitar encadenar solicitudes críticas ? |
Categoría: Sin categoría
FASTVAULT
Fastvault: free file-sharing page up to 100GB
CC2 Juan Luis Bermudez –

Fastvault is a free solution for privately and secure large file sharing. Specifically, you can use it to share files up to 100GB, a true barbarity.
These types of tools are very practical to share or send those huge files that cannot be attached in email or house anywhere because of their large size. They are becoming more useful, the higher transfer speeds and the greater storage space of our computers means that we are getting more files of these sizes.
The most interesting thing about Fastvault, in addition to allowing the sending of files up to 100 GB, is that it is a platform to share files in a decentralized way. This has an impact on the security of our files, they are not stored in a single centralized location, instead they do so on multiple computers.
Of course, the whole process is carried out in an encrypted manner. One more feature to ensure the protection and privacy of the files we share.
How is Fastvault used?
Another interesting feature of Fastvault is that it is very easy to use from the first occasion, you will have no problem.
Here are the simple steps to follow:
- Select the file or files you’ll share, you can also use drag and drop. You should keep in mind that the file or set of files (up to a maximum of 20 at a time) cannot exceed 100 GB.
- Then you can add an extra layer of protection by setting a password. The recipient must know this password in order to download the file or files.
- In the next step you can decide how you’re going to share your files. You can choose between Email to e-mail or Link Linkto get a link that you must provide to the shipping recipient.
- The next step allows you to activate, enabling the Yesoption of your files being automatically destroyed after 24 hours or when downloaded by the recipient.
- The last step is to click on the button. Send Now and share your files.
TE PUEDE INTERESARInternxt Send: a page to send free files up to 5 GB
Visit this page to share large files
You only need to visit the Fastvault website is one of the best free solutions for large file sharing.
On the network you can find similar services or tools, although few or none will allow you to share files up to 100GB. One of them, you can use it to freely share files up to 2GB, is Workupload.
Repaso, refuerzo y recuperación
Cómo crear un rosco, como el de pasapalabra, con EDUCAPLAY, con el que podemos repasar, reforzar, asentar conocimientos…
Además os indicamos como podeis insertar esta actividad en vuestra página web, blog o en una plataforma de Moodle.
REMOVER APP
Remover App: remove people, texts and elements from photos for free
CC2 JUAN LUIS

Remover App is a page, or a web tool, with which you can remove people, text and any element you don’t want in your photos . It’s very easy to use, it really seems like magic, and you don’t need image editing skills.
Best of all, this tool is completely free to use , at the time of writing, and doesn’t even require registration. In this way, you do not need to provide your email, or any other personal data.
If you have a photo with an uninvited character, someone walking right behind you to spoil the photo, an object that shouldn’t be there, a text or watermark, and generally anything you don’t want on your photo, you can easily remove it with Remover App.
In addition, there is no need to download or install programs or applications. You are going to use this tool directly from your favorite browser, in seconds you will have eliminated any element that you do not like from a photograph.
Forget about following complex tutorials to learn how to remove elements from photos with Photoshop and other tools. With this simple web application you will achieve it easily, in a matter of seconds.
How to use Remover App?
Removing any element from photos or images with Remover App is really easy. Basically it is about pointing to the element you want to delete and little else. Next, I explain it step by step:
- Select the photo to be edited, showing any items you want to remove.
- Use the blue colored circle to point to any text, person, animal, object or other item you wish to remove from the photo. If you want, you can adjust the size of the circle, for example making it smaller to remove thin or small elements.
- Optionally, you have at your fingertips the “undo icon” to go back if you have deleted something you didn’t want.
- When you’re done editing, removing any elements you don’t like, just click the “down arrow” icon to download your new image .
Actually, as you will have verified after reading the previous instructions, using this tool does not present any type of difficulty. Still, better see it for yourself in the video that follows:
Visit this page to remove items from photos
A simple visit to the Remover App website is all it takes to remove any unwanted items from your photos . It is a very intuitive tool that works magic with photographs.
If you like this tool, remember that previously I have already told you about other similar ones that you can also try, one of them is Remove Unwanted Object from Photo online .
VIDEOO CANDY
Video Candy is an excellent page to find all the tools you need to edit your videos in a very simple way . All of these tools are available for free use and you do not need to create an account or sign up.
In most cases, it is not necessary to resort to a complex and expensive video editing program, nor to have the necessary knowledge to use it, to carry out the most common video editing tasks.
In these cases, sites like Video Candy are very useful. They bring together in one place all the tools that we may need to carry out the most common video editing jobs.
Without having to download or install any software, an extensive collection of free online video editing tools are waiting for you on this page.
What tools can I find in Video Candy?
On the Video Candy website you will find a total of 15 different tools to edit your videos online and without any complications.
These are the tools currently available :
- Compress videos
- trim videos
- join videos
- cut videos
- Change video dimensions
- Convert videos to stop motion
- Add music to videos
- Change video speed
- mute videos
- Create slideshow with music
- reverse videos
- rotate videos
- repeat videos in loop
- flip videos
- Convert videos to GIF animations
YOU MAY BE INTERESTED Add text to video online simply and completely free
All these tools are very easy to use. Basically it is about loading the video that you are going to edit and exporting your new video with the changes already made.
Visit this page with tools to edit videos
You can pay a visit to the Video Candy website whenever you need free web tools to edit videos quickly and easily.
Another site with a bunch of free video editing tools is Fastreel .
Herramientas «Imprescindibles»
Haced clic en el título de cada mini herramienta para acceder a ella. ¡Esperamos que os sirvan!

1. Type A4 – Herramienta para hacer carteles de una letra por hoja.
2. Chronas – Mapa interactivo para descubrir la historia del mundo.
3. ClassroomScreen – Herramientas muy útiles para el desarrollo de las clases.
4. PuzzleFast – Para crear pasatiempos y juegos imprimibles en segundos.
5. I love PDF – Convierte, comprime, divide, une, edita y transforma online cualquier PDF.
6. Mclibre – Generador de hojas de caligrafía personalizadas.
7. The Newspaper Clipping Generator – Permite crear noticias con aspecto de periódico.
8. Toy Theater – Web con infinidad de juegos interactivos.
9. Word Art – Para crear nubes de palabras. Antes se llamaba Tagul.
10. Video Ciborg – Herramienta gratuita para descargar los vídeos de una web con un solo clic.
11. Carrd – Maravillosa herramienta para crear páginas webs sencillas, funcionales y atractivas.
12. Pictotraductor – Transforma frases en castellano en secuencias de imágenes.
13. Fluky – Para realizar sorteos o elegir algo al azar.
14. Guerrillamail – Herramienta para crear un email temporal.
15. Jitter – Permite crear increíbles diseños y vídeos.
16. Incredibox – Aplicación sencilla para jugar con los ritmos y crear melodías.
17. WiseMapping – Para crear mapas conceptuales.
18. SEN Teacher – Recursos editables y gratuitos para diferentes áreas.
19. Team Maker – Herramienta online para hacer grupos o equipos al momento.
Google HangOuts.
Con hangouts la videoconferencia es una opción y NO es requisito para utilizarlo, es más, su uso en caso de equipos poco potentes, o conexiones de red limitadas se recomienda utilizarlo sin video.
¡Es casi seguro que ya tienes esta opción programada! Dado que muchas personas tienen una cuenta en Gmail, usar Google Hangouts es muy fácil. Puedes utilizarlo en Google Chrome, Firefox y Safari desde el sitio web o por medio de su aplicación, ya sea para iOS o Android.
Cómo funciona Google Hangouts
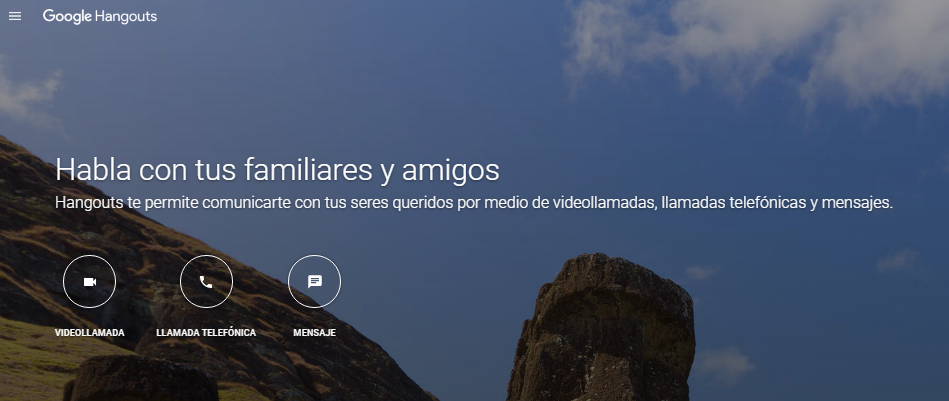
Comienza por acceder a tu cuenta de gmail, y una vez en ellas, en la esquina superior derecha tendrás las opciones de acceso a aplicaciones google, busca hangouts y ponte a funciona por dar en «Aceptar» cuando te pida el acceso a la cámara y al micrófono. Después, dentro de tu lista de contactos, deberás dar en el icono de quienes deseas agregar.
Una vez que comience tu videoconferencia, puedes hacer clic en la opción «Añadir personas», si deseas una conversación multipartita.
Mira el siguiente video si te queda alguna duda acerca de cómo comenzar en Hangouts:
Créditos: Universidad de la Sabana-Colombia
Ventajas de Hangouts
- En general, es una herramienta potente que brinda una buena calidad en las videollamadas.
- Está acoplado perfectamente con YouTube, por lo que podrás compartir las sesiones con aquellos que no estuvieron presentes.
- Te da la opción de «Compartir pantalla» con lo que facilitarás tu exposición.
Desventajas de Hangouts
- Es forzoso que todos los participantes tengan una cuenta de Google y accedan por medio de ella.
- Salvo que lo subas a YouTube, no tienes una opción directa para guardar la videoconferencia.
- Si lo utilizas en un equipo de escritorio, tendrás que acceder a través de tu navegador; es decir, que no tiene un programa descargable.
Es super sencillo de utilizar, perfecto para los que como yo pasan de video (aunque tiene esta opción para los que les hace falta verse) y una vez lo en él, es usándolo como lo manejarás a la perfección, pero si queréis algo más dedicado, recomendaros KIALO EDU.
________________________________________________________________________________________________
KIALO EDU, a unique tool for teaching critical thinking
Kialo Edu is a custom version of Kialo (kialo.com), the world’s largest argument mapping and debate site, specifically designed for classroom use. Its clear, visually compelling format makes it easy to follow the logical structure of a discussion and facilitates thoughtful collaboration. Kialo’s mission is to promote well-reasoned discussion online, and to that end, Kialo is free for educators to use.
Use Kialo to help students get to the core of the issues they’re discussing
To put their knowledge into action
To sharpen their critical reasoning skills
To demonstrate their understanding
To engage constructively with each other
Take your classroom discussions online, break down complex subjects for students, and shake it up with new types of assignments.
Posterazor
PosteRazor es una aplicación pensada para todos los aficionados a decorar sus paredes con posters personalizados.
Gracias a este sencillo programa podrás crear un cartel o póster a través de un simple proceso guiado por un asistente y usando la foto que té elijas.
PosteRazor está desarrollado en una interfaz muy sencilla e intuitiva. Lo único que tienes que hacer es escoger la foto guardada en tu disco duro, elegir el tamaño del papel y su formato. La impresión se realizará en varios folios dependiendo del tamaño final que hayamos determinado.
De esta forma, si en la plantilla nos sale la imagen dividida en 4 cuadros por ejemplo, cada cuadro será una hoja que se imprime con bordes para que puedas pegarlas a las otras. El resultado final se guarda en PDF.
Se recomienda usar imágenes con calidad para que el poster tenga una apariencia aceptable.
De Color a Blanco y Negro con XnSkech
Hola a todos:
Seguro que más de una vez, estáis trabajando un libro y os habría apetecido tener la portada en blanco y negro para reforzar vocabulario, para trabajar alguna técnica pictórica, para…. pero si queríais hacerla os teníais que poner a editar con photoshop desde WinShit o usando The Gimp con Linux.
Pues bién, como no estamos para perder el tiempo (bastante nos toca apurar y estirar el día) aquí os dejo un programa que con una simple selección de imagen aplica unas opciones por defecto que os va a permitir utilizar la imagen sin colores, sin escala de grises y totalmente preparada para utilizar como vuestra imaginación desee.
Esta utilidad se llama XnSketch y la podéis encontrar tanto para WinShit, como para Mac como para LINUX.
Su pantalla principal es tan simple como añadir imagen, aplicar imagen (dar cera, pulir cera):

y cuando desde la imagen del folder con la flecha azul añadimos la imagen (en mi caso la de BaT en color)…

la deja como…

que guardándola en nuestro HD, queda preparadísima para utilizar en la actividad que nos venga en gana…

(por supuesto, eso es con las opciones que vienen por defecto en el programa, pero podéis ajustar brillo, contraste, saturación…. para adaptarlo a lo que os interese y luego simplemente recortar con un simple paint y a funcionar)
AHHHH, LA PÁGINA OFICIAL DEL PROGRAMA ESTÁ EN:
